First Grade Science Standard: L.OL.E.2 Life Cycles- Plants and animals have life cycles. Both plants and animals begin life and develop into adults, reproduce, and eventually die. The details of this life cycle are different for different organisms.
L.OL.01.21 Describe the life cycle of animals including the following stages:
egg, young, adult.
Life Cycle of the Silkie Chicken

Just as there are many breeds of dogs, there are also many different types of chickens. We will look at the life cycle of the silkie chicken originally from southeast Asia, first mentioned by Marco Polo in the 13th century. This unique breed has fluffy feathers, black skin, five toes and turquoise ears. This spring our family wanted to buy some silkie baby chicks, but were unable to find any baby chicks at the local feed stores. So we decided to take the next step in raising chickens - hatch fertilized eggs in a homemade incubator! We located a farmer in Columbiaville that had a listing on Craig's List (a computer listing) that he had fertilized silkie chicken eggs for sale. We then began our research on how to build an incubator on YouTube.
Homemade Incubator
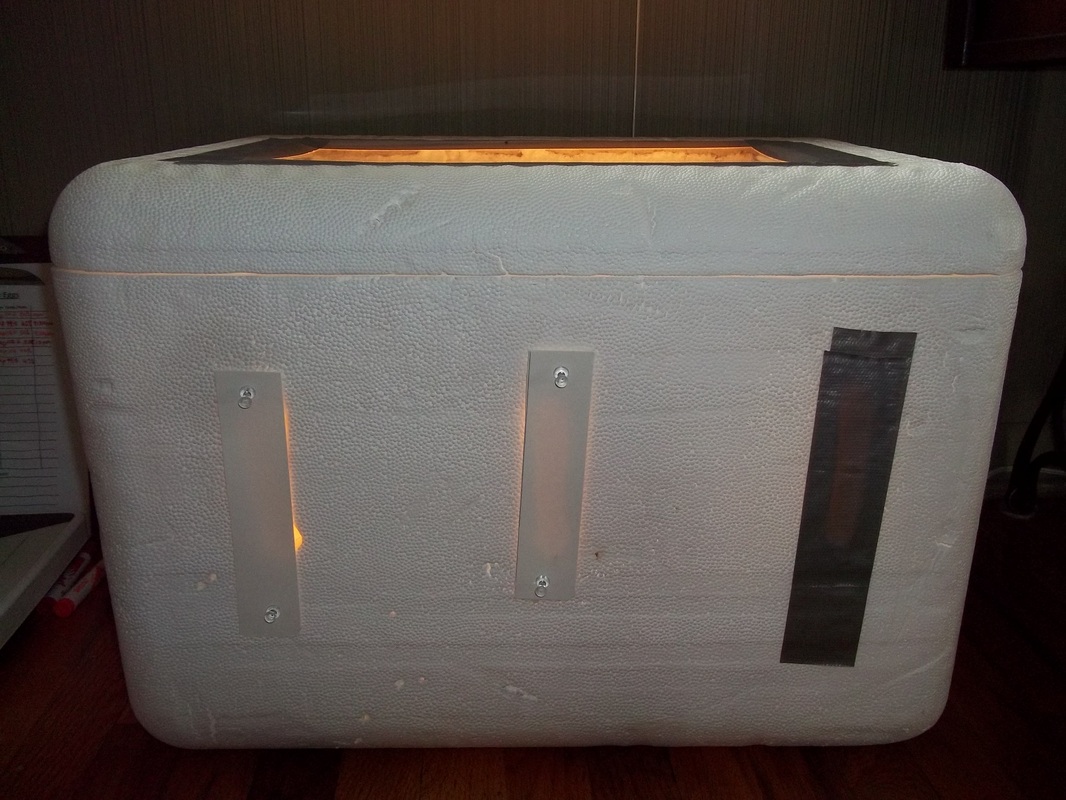
Fertilized chicken eggs have to incubate 21 days. During this time the temperature must stay between 98 to 102 degrees with an average humidity of 55%. We decided to use an old Omaha Steak styrofoam cooler, as this had very thick walls and was well insulated. The heat source we used was a 25 watt light bulb. In addition, we filled two water bottles and put them in the cooler - this helped maintain a steady temperature. We put the lids of two egg cartons to hold water to keep the humidity around 55%. A hole was cut in the lid of the cooler and replaced with plexiglass as a window. We also cut side slits to help regulate the temperature. If the temp needed to cool down, we would open the slits. To warm up the incubator we would close the slits and sometimes even put a towel over the top to stop any heat loss through the window.
Inside the Incubator
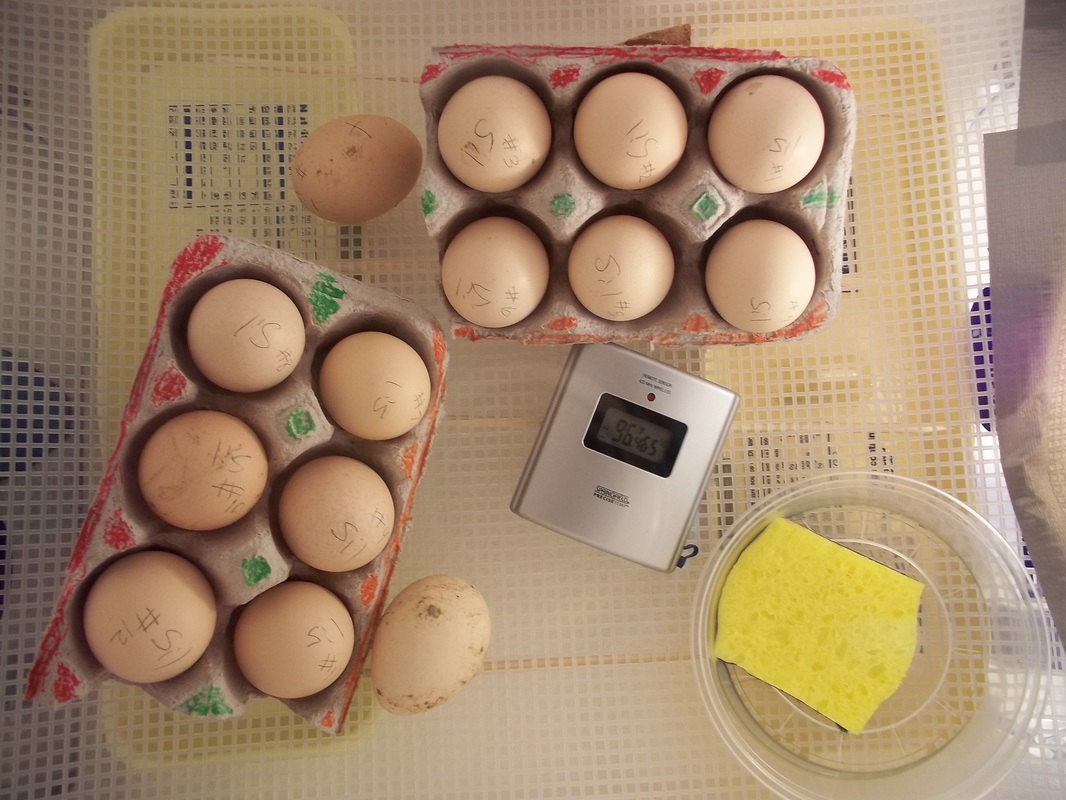
Many people had different designs for their homemade incubator on YouTube. We took the best of the ideas, compiled them and came up with our own. Due to the fact that the eggs must be turned at minimum three times a day for proper chick development, one suggestion was to put the eggs in cartons and turn them all at once. (The farmer was generous and gave us two extra eggs when we bought a dozen for $12.) The mat that makes the floor of our incubator was bought from JoAnn's Craft store. Its original purpose is for cross stitch, but really made a wonderful, soft, and flexible floor. We also bought a thermometer that registered temperature and humidity from Menard's for $10.
Chick Development
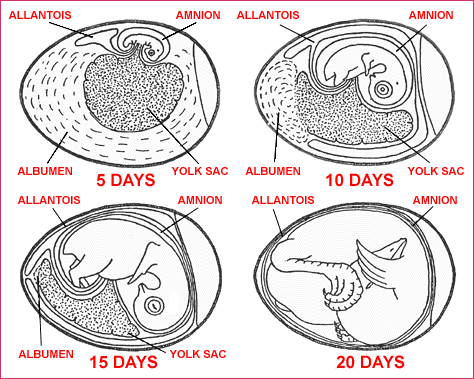
In order to check the progress of the chick's development, we used a procedure called candling. Candling is really as simple as holding a powerful flashlight up to the chicken egg in a dark room. This allows you to see images inside the egg. The first step was to verify that every egg was indeed fertilized. On day three of incubation, if an egg is fertilized, blood vessels will be apparent. We were fortunate, all fourteen eggs showed blood vessels. We continued to check development every three days by candling the eggs. A few days after the blood vessels can be seen, a moving, dark mass appears in the center of the egg. This is the baby chick. We continued to track the development of each egg, until day 16 when the baby chick became too large to move.
Hatching

To our surprise, early in the morning on day 19 we noticed a small peck hole in egg #7. The little baby chick slowly, but diligently, continued to peck all the way around the egg - this took most of the day. By evening, the chick had begun to kick its way out of the shell. Stretching, kicking, resting, stretching, kicking, resting. . . finally the baby chick was out! Watch this video of a baby chick hatching.
I'm out of here!
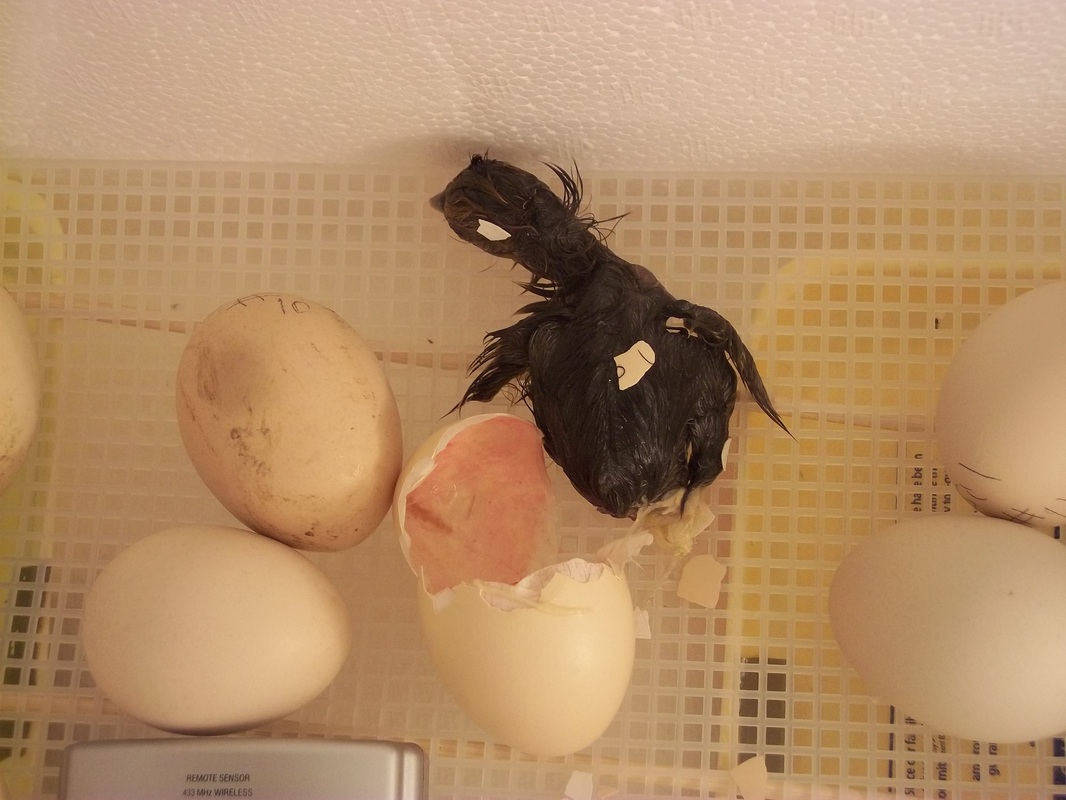
Birth is a messy event! This little chick was tired and wet. Baby chicks can stay in the incubator for 24 - 48 hours. During the last stage of development, the yolk is absorbed into the chick, providing nutrition while the chick rests and gains strength. Once the chick has dried off, it's then safe to put it into a brooder box with pine shavings on the bottom and a heat light keeping the box at 95 degrees.
All Dried and Fluffy
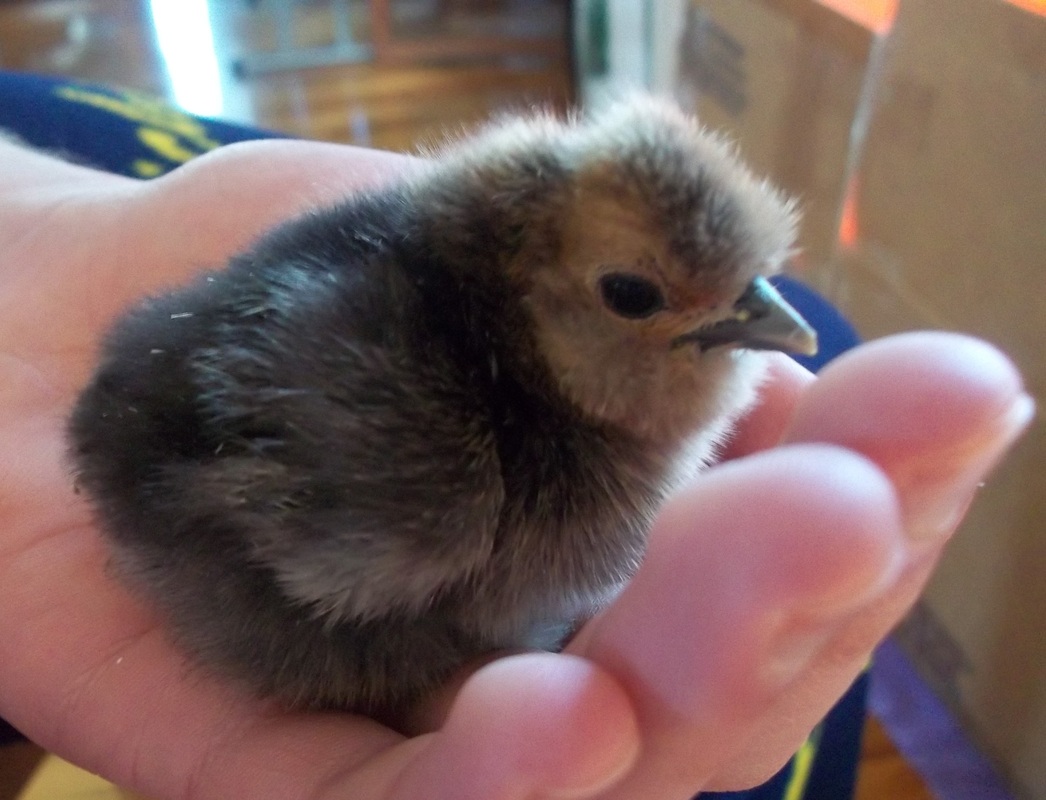
About 10 hours later, here is the first chick completely dried and now fluffy. The baby chick will now spend the next few weeks in a brooder box to staying warm, eating and scratching in the pine shavings.
Two Weeks Old
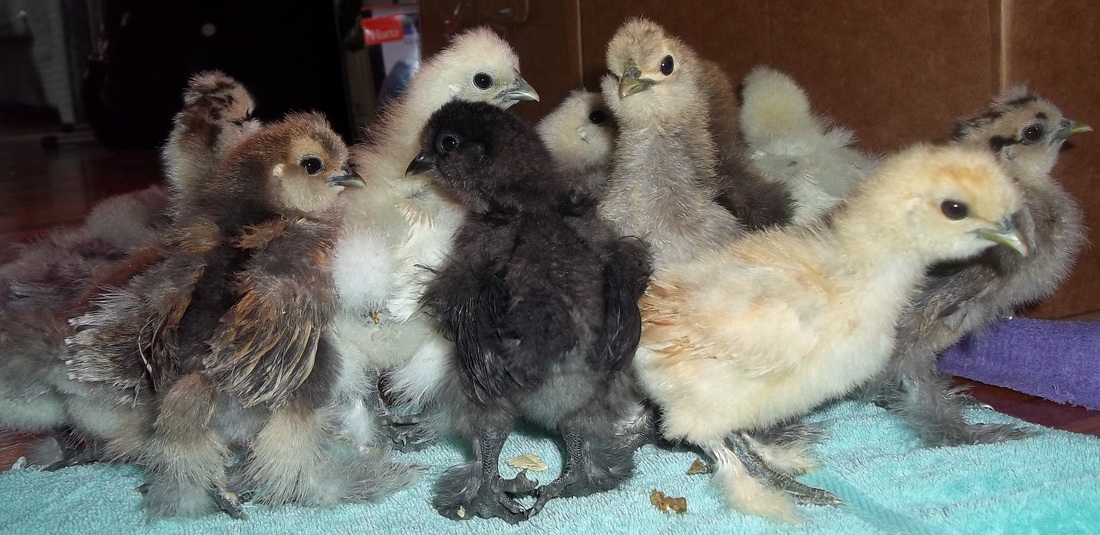
Here's the group now two weeks old. They are beginnig to get their wing feathers and growing larger every day.
Incubating and hatching chickens is a great way to learn about life cycles and the development of embryos to a baby chick. This can be a great project for any grade - as you can adjust the information to be age appropriate.
Incubating and hatching chickens is a great way to learn about life cycles and the development of embryos to a baby chick. This can be a great project for any grade - as you can adjust the information to be age appropriate.
Three Weeks Old
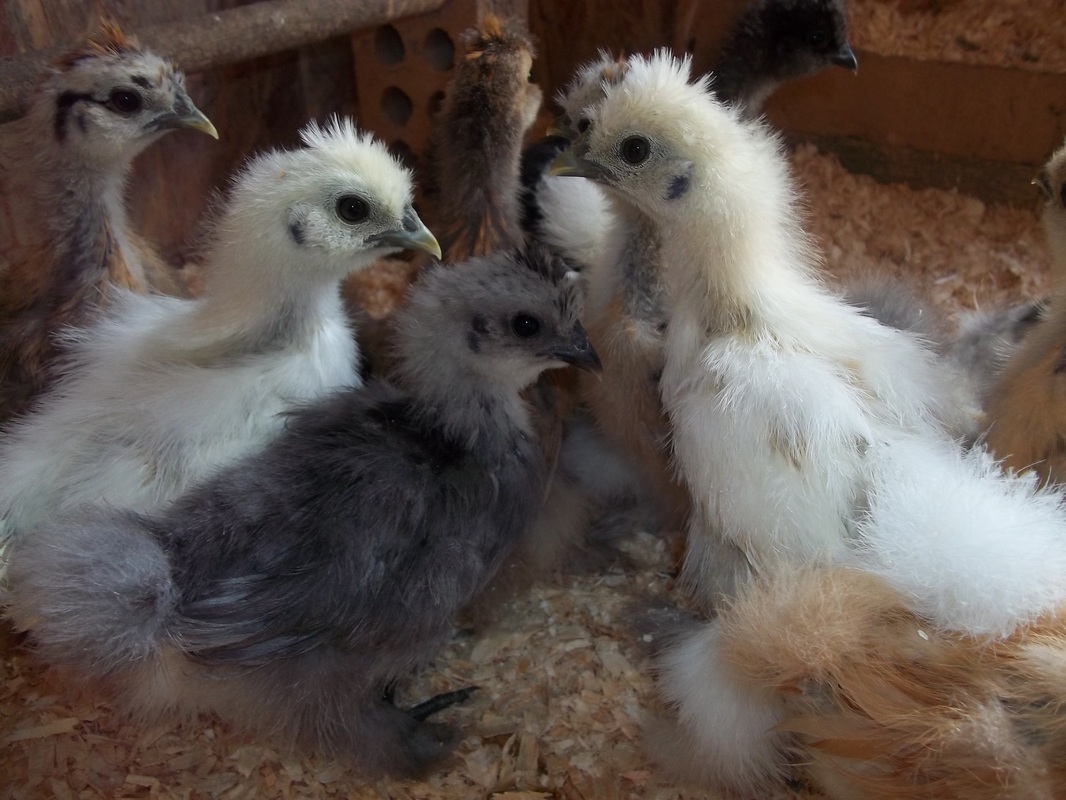
Moved out into their own home! The baby chicks now have enough feather covering and it has warmed up enough outside for them to be in the chicken coop and out of the brooder box.
Two Months Old
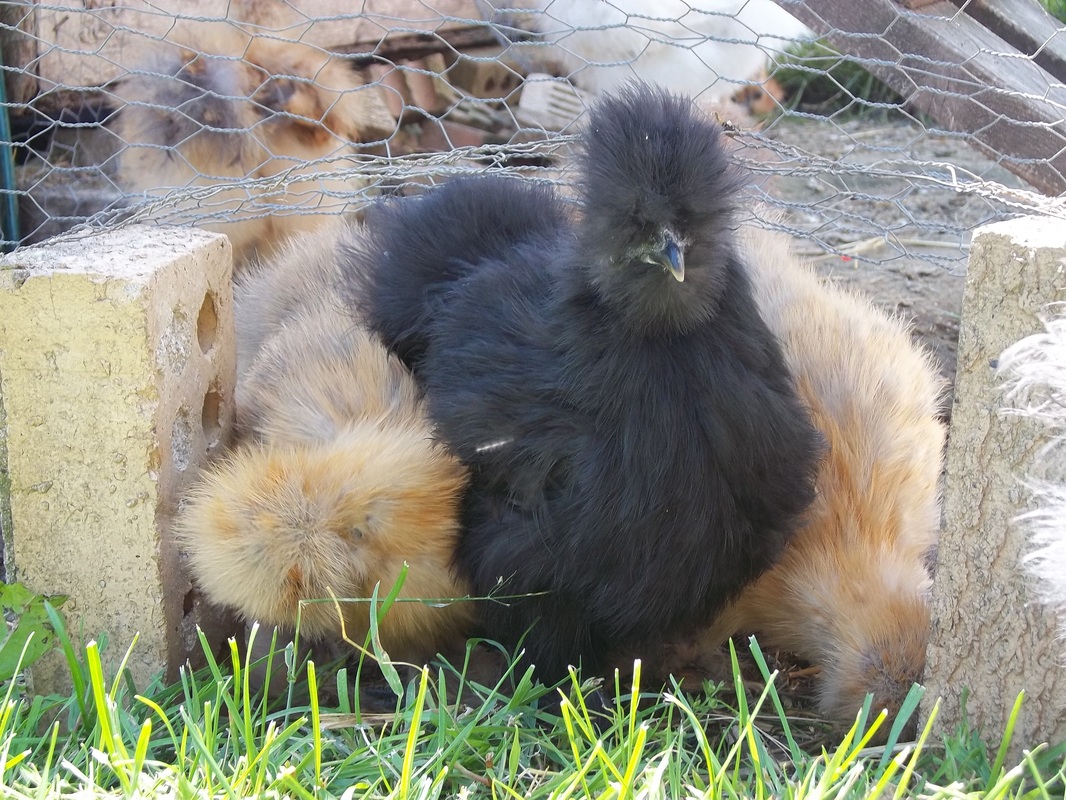
The silkies' feathers are really coming in, giving them that silkie look they are known for. Fourteen eggs and two months, later we have twelve silkies growing strong! Not a bad hatch rate for our first time with a homemade incubator.
Incubating and Hatching Chicken Eggs Participation Rubric
Click here for a great student worksheet to help students remember how eggs and baby chicks should be handled:
Caring for Eggs and Chickens
Caring for Eggs and Chickens
Now look at some other classrooms that hatched chickens: Hatching Chickens in the Classroom
